

What you need
- A mailbox you can open in the Mermail console.
- A clear idea of what separates the mail you want labeled from the mail you don’t. The rule is the whole feature; the label is just a name and a color.
Open the Custom labels page
Click the gear icon beside the mailbox name to open Settings, scroll to Custom labels, and click Manage labels. The page lists every label on the mailbox, with its color, its name, and the rule the AI follows.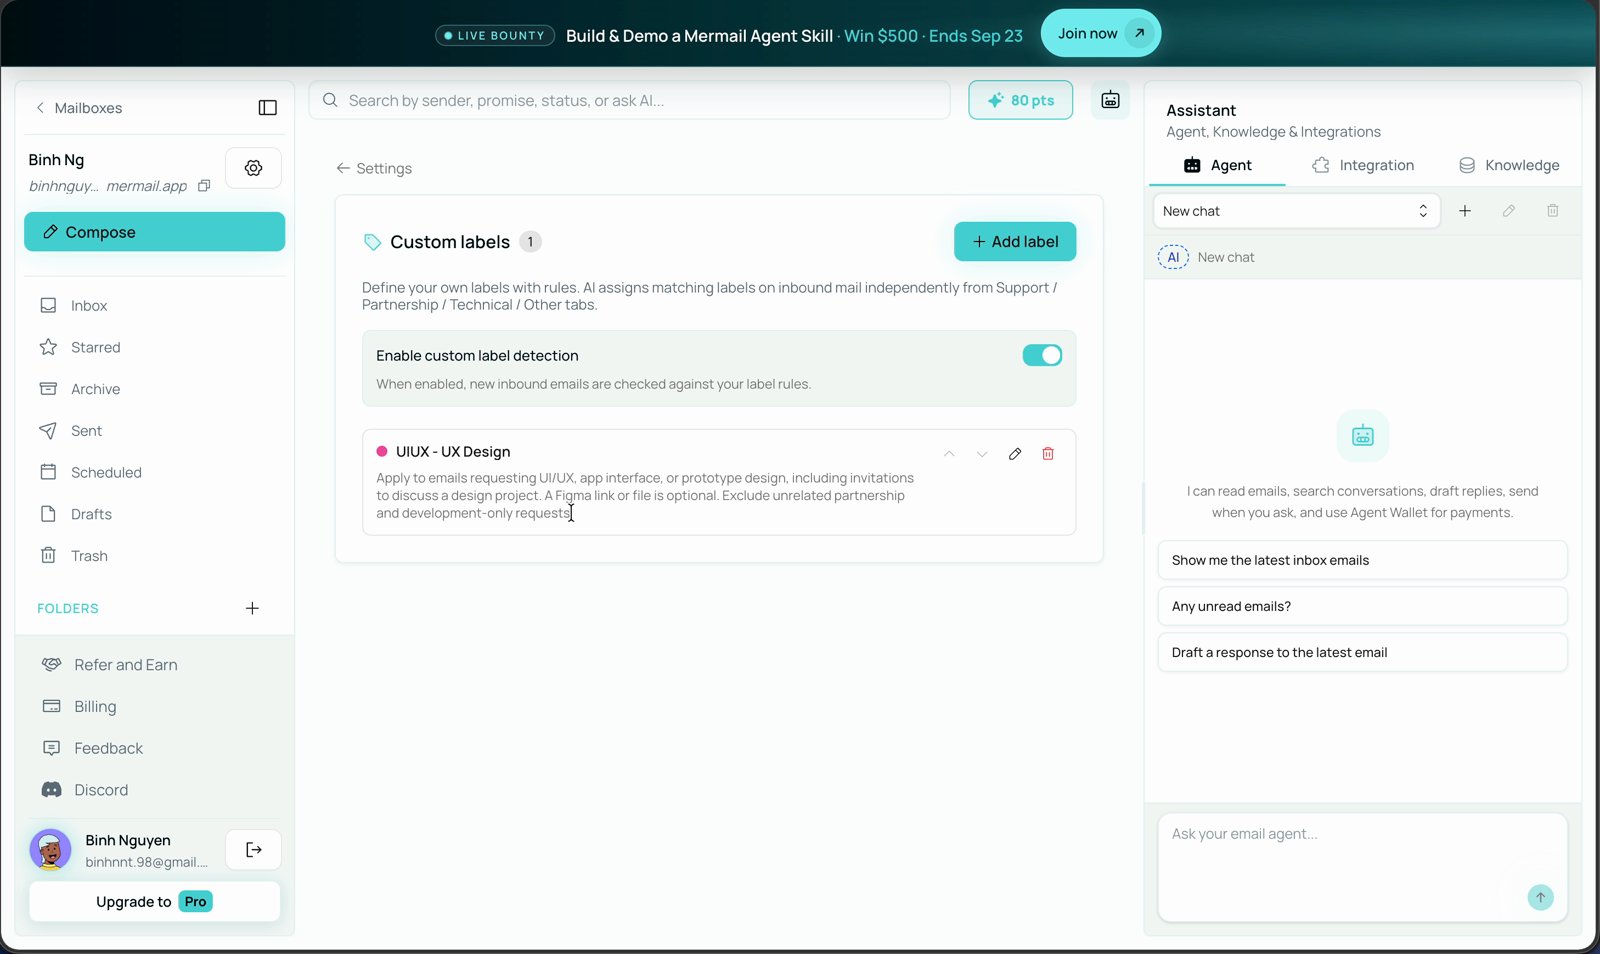
The Custom labels page. Each row shows the rule that decides when the label applies.
Create a label
1
Click Add label
A short editor opens below the list with three fields: Name, Rules, and Color. Name and rules are both required.
2
Name the label
Use the name you want to see on the message itself, such as
UIUX - UX Design. Keep it short — it appears as a chip next to every other label on the email.3
Write the rule
This is the part that matters. Describe what the email has to be about for the label to apply, and say what to leave out.Notice the shape of it: what counts, what is optional, and what is explicitly excluded. The exclusion line is what stops a label from spreading to everything nearby.Rules can be up to 500 characters. Mermail warns you while you type if the rules look broad enough to catch most of your mail — for example wording like “all emails”.
4
Pick a color
Choose one of the preset swatches. The color is how you spot the label at a glance in a crowded list, so give related labels different colors.
5
Save label
Click Save label. A confirmation appears and the label joins the list. A mailbox can hold up to 20 custom labels.
Turn detection on
Enable custom label detection sits above the list. While it is on, every new inbound email is checked against your label rules as it arrives. The toggle stays disabled until the mailbox has at least one label, so create a label first.Only inbound mail is checked, and only as it arrives. Turning detection on does not go back and label messages you already received.
See it work
When a matching message arrives, the label appears on it in the inbox list, next to the built-in category and any other labels the message picked up.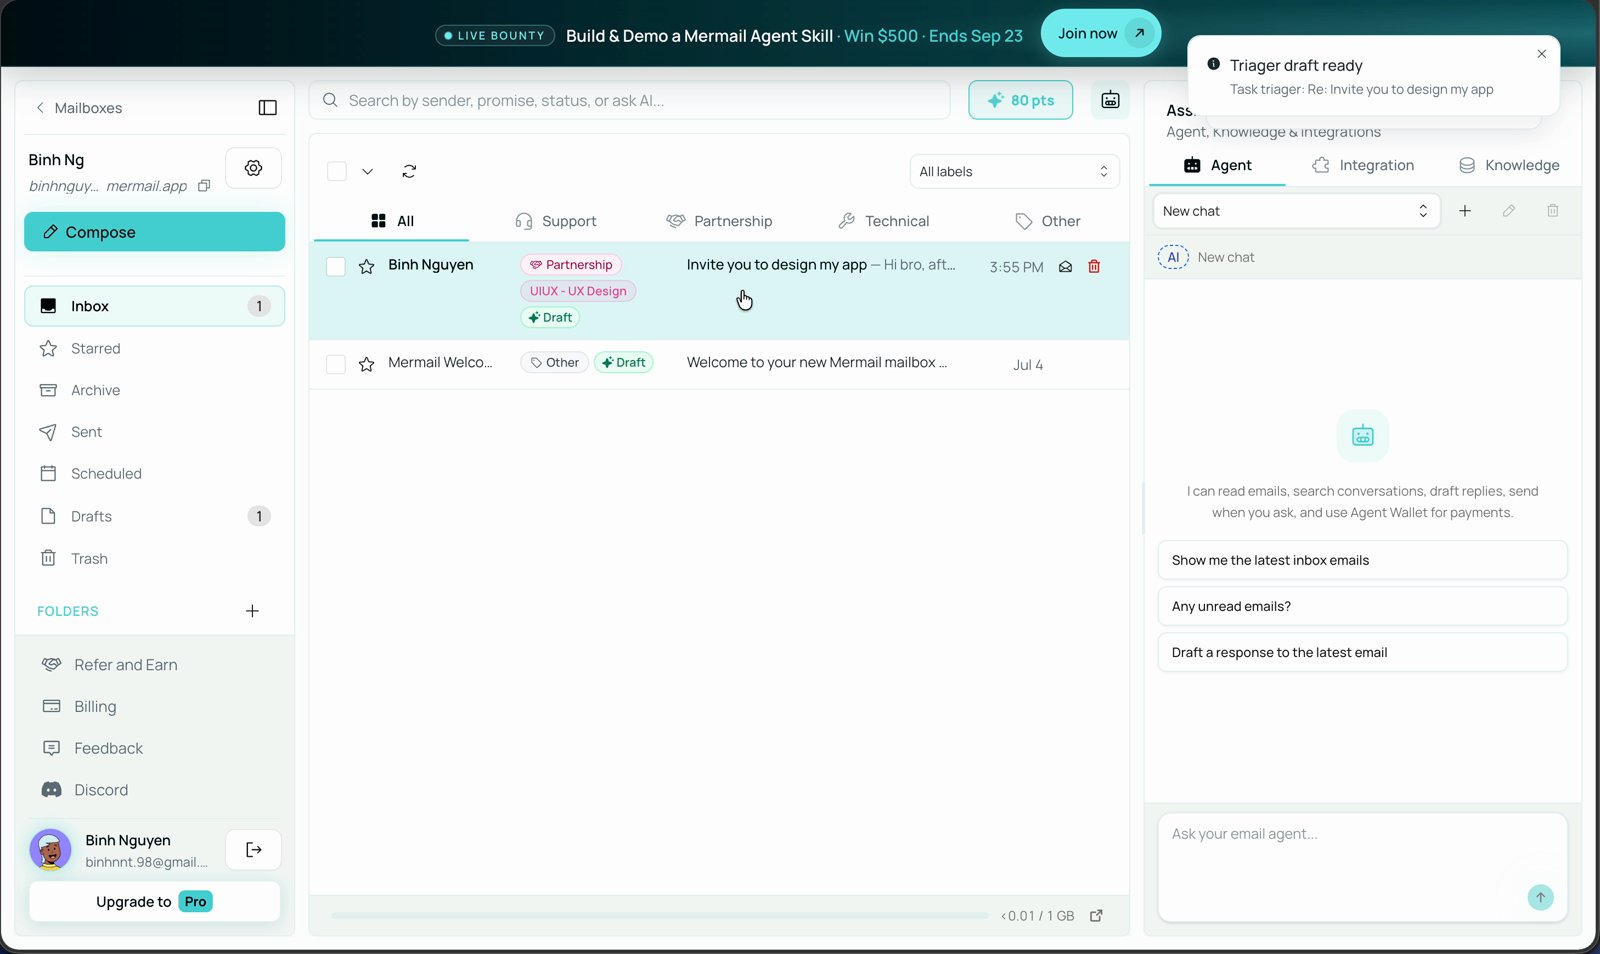
The incoming design request, tagged UIUX - UX Design next to the built-in Partnership category.
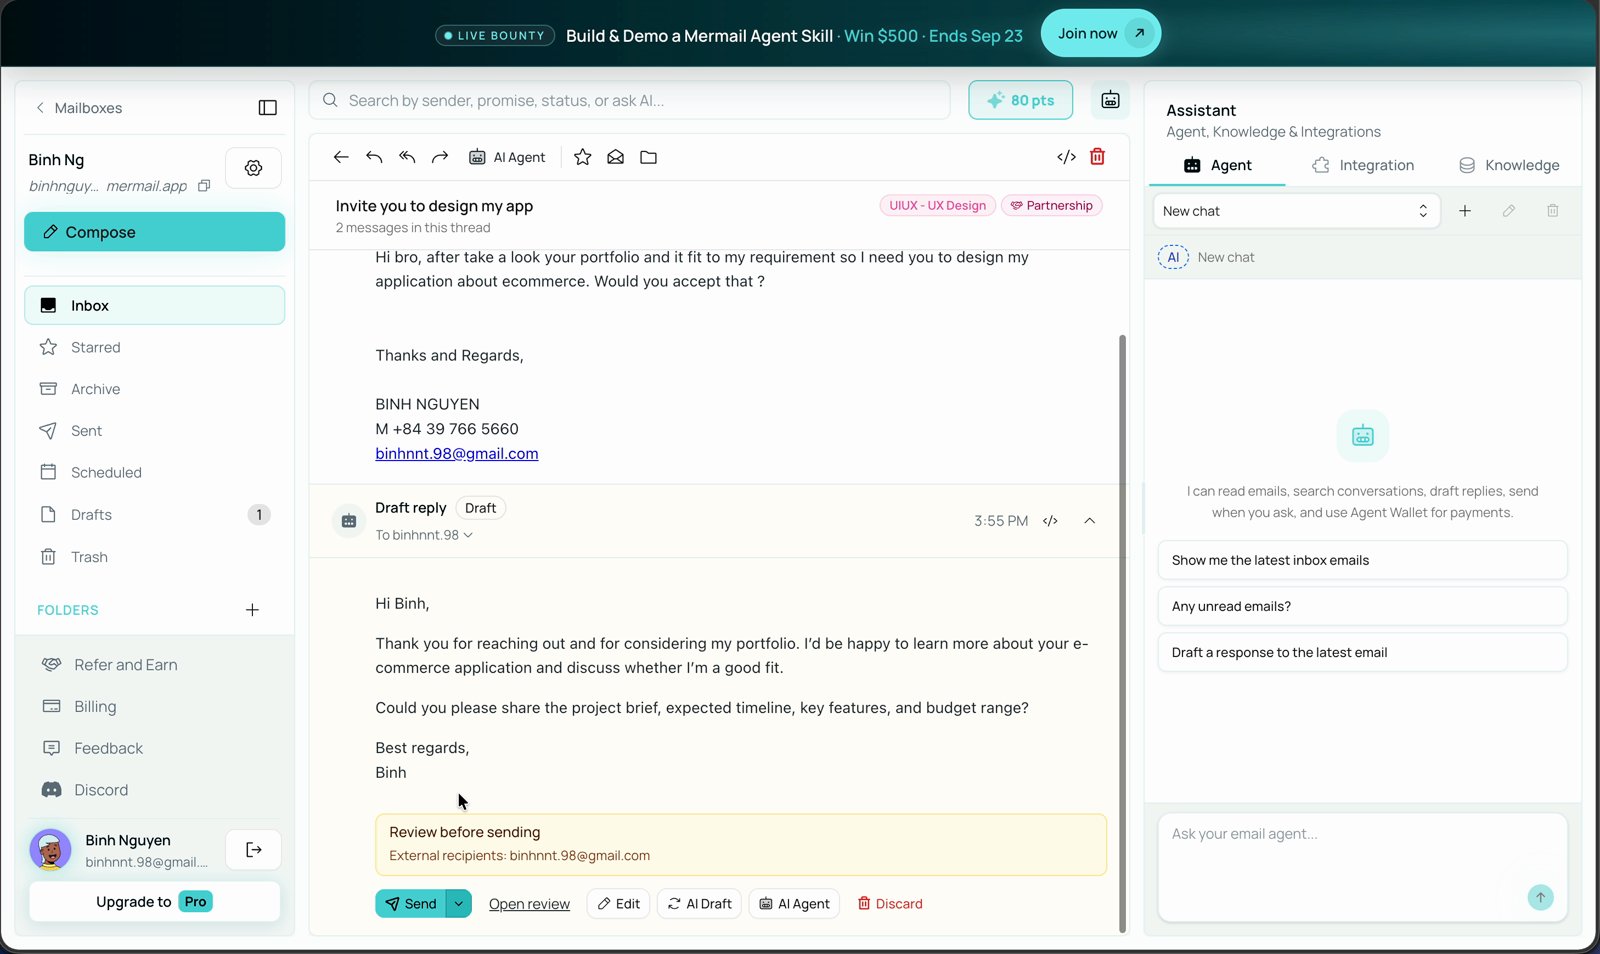
Custom labels follow the thread, so they stay visible while you read.
How Mermail decides
- Every matching label is applied. One email can carry several custom labels at once if more than one rule clearly matches.
- No match means no label. Mermail does not apply the closest label; it applies nothing.
- Your rules are the only criteria. The AI deliberately ignores category and urgency instincts here — a label lands only when its own rule matches.
- Custom labels are independent of the built-in tabs. A message labeled
UIUX - UX Designcan still sit under Partnership, as in the example above.
Manage your labels
Write rules that work
- Describe the request, not the sender, unless the sender really is the rule. “Emails from
@vc.com” is a fine rule; “important design stuff” is not. - Name what is optional. Saying a Figma link is optional stops the AI from treating it as required.
- Always add an exclusion. One line of “exclude X” does more for precision than three lines of description.
- Avoid “all”, “every”, and “any email”. Mermail flags this wording because a label on everything is a label on nothing.
- Check after a few days. No matches usually means the rule is too vague; matches everywhere means it is too broad.
Related
Urgent email detection
Decide, in your own words, which incoming mail counts as urgent.
Task triager
Run your own instructions automatically when a calendar event or email arrives.